Mutianyu Great Wall Map: The Short Answer
Read the Mutianyu map as three zones: East Zone Towers 1–6 (chairlift + toboggan hub), Middle Zone Towers 7–13 (quiet walking connector), and West Zone Towers 14–23 (cable car hub at Tower 14 through the reopened Towers 21–23 on the far west). The simplest map rule: cable car goes to Tower 14 (west route); chairlift and toboggan connect at Tower 6 (east route).
- Drive time from Beijing: On-site map-based plans run 2–6 hours. Round-trip from downtown Beijing typically 7–9 hours total.
- Typical visit style: Quick west check-in 2–2.5 hr; standard west route 3–4 hr; east toboggan route 2.5–3.5 hr; combined east-west 4–6 hr.
- Difficulty: Low for the cable car west line to Tower 15–18. Moderate for Towers 19–20 and combined east-west walks. Steeper for the west extension through Towers 21–23.
- Crowds: West cable car queues peak late morning on weekends and Chinese public holidays. Start early to keep the map plan on schedule.
- Best for: First-time visitors using the west cable car to Tower 14; Families and seniors on the short west-line route; Toboggan visitors using the east chairlift to Tower 6; Active travelers walking from Tower 14 east to Tower 6; Visitors who want the open Tower 1–23 boundary made clear
- Less ideal for: Visitors treating older maps that stop at Tower 20 as current; Anyone treating the scenic shuttle bus as transport from Beijing; Visitors mixing west cable car round-trip and toboggan tickets
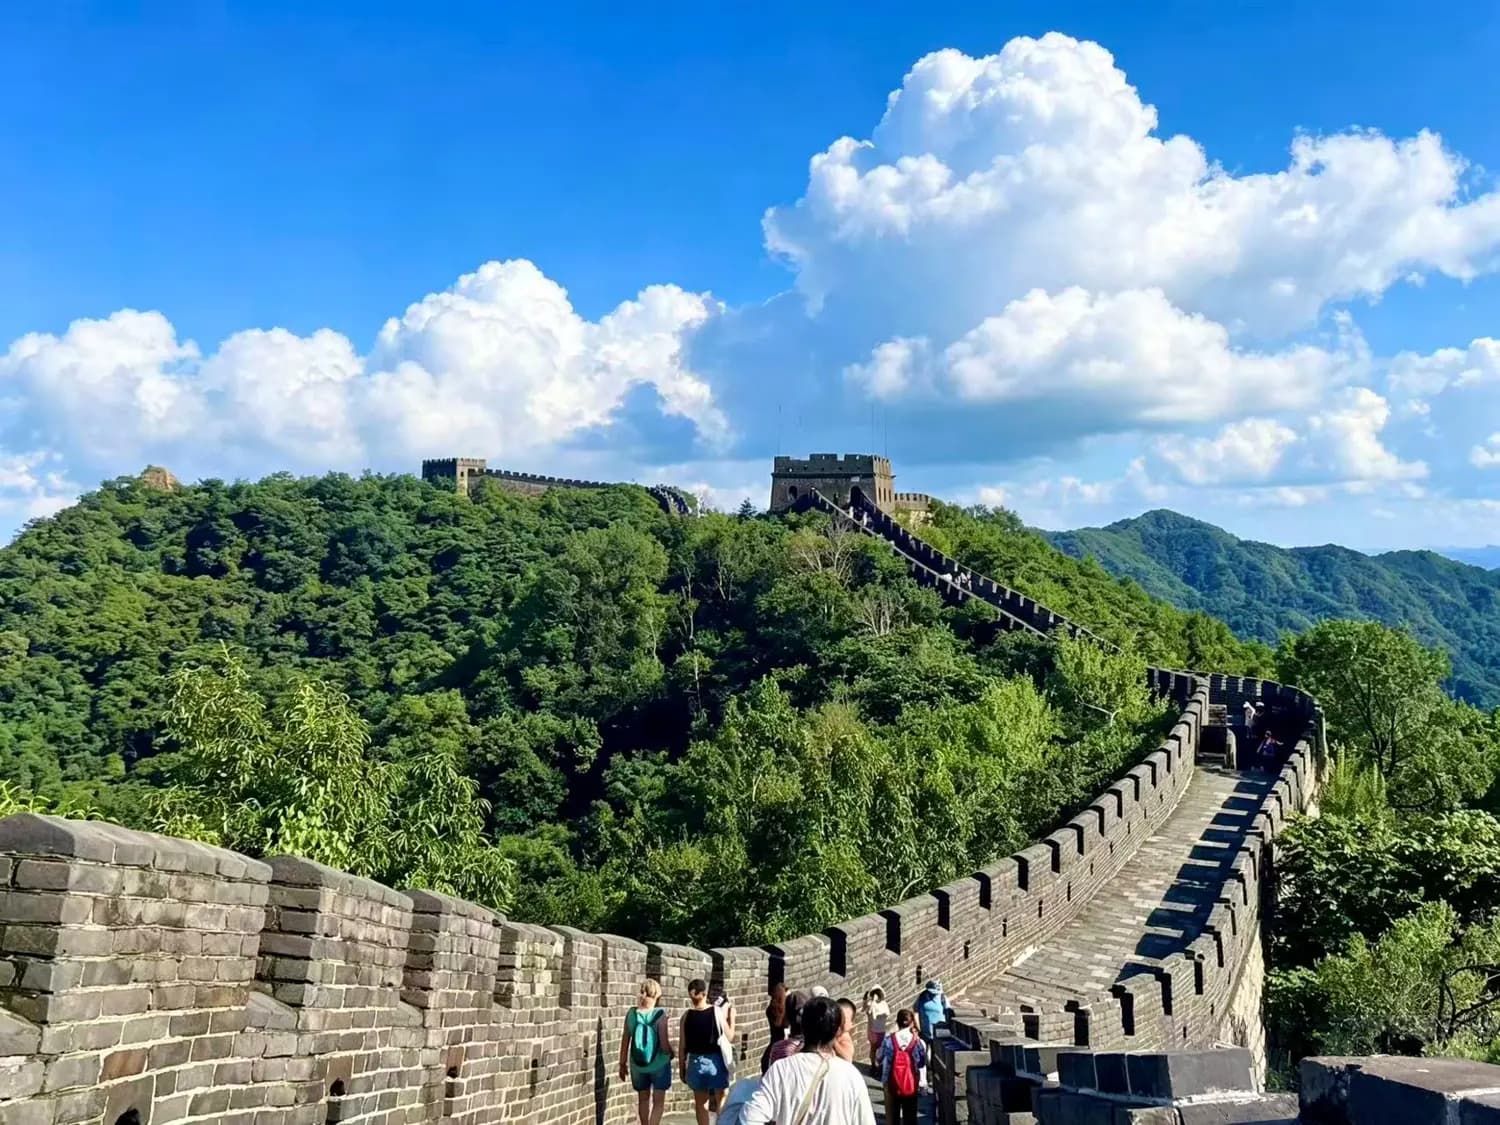
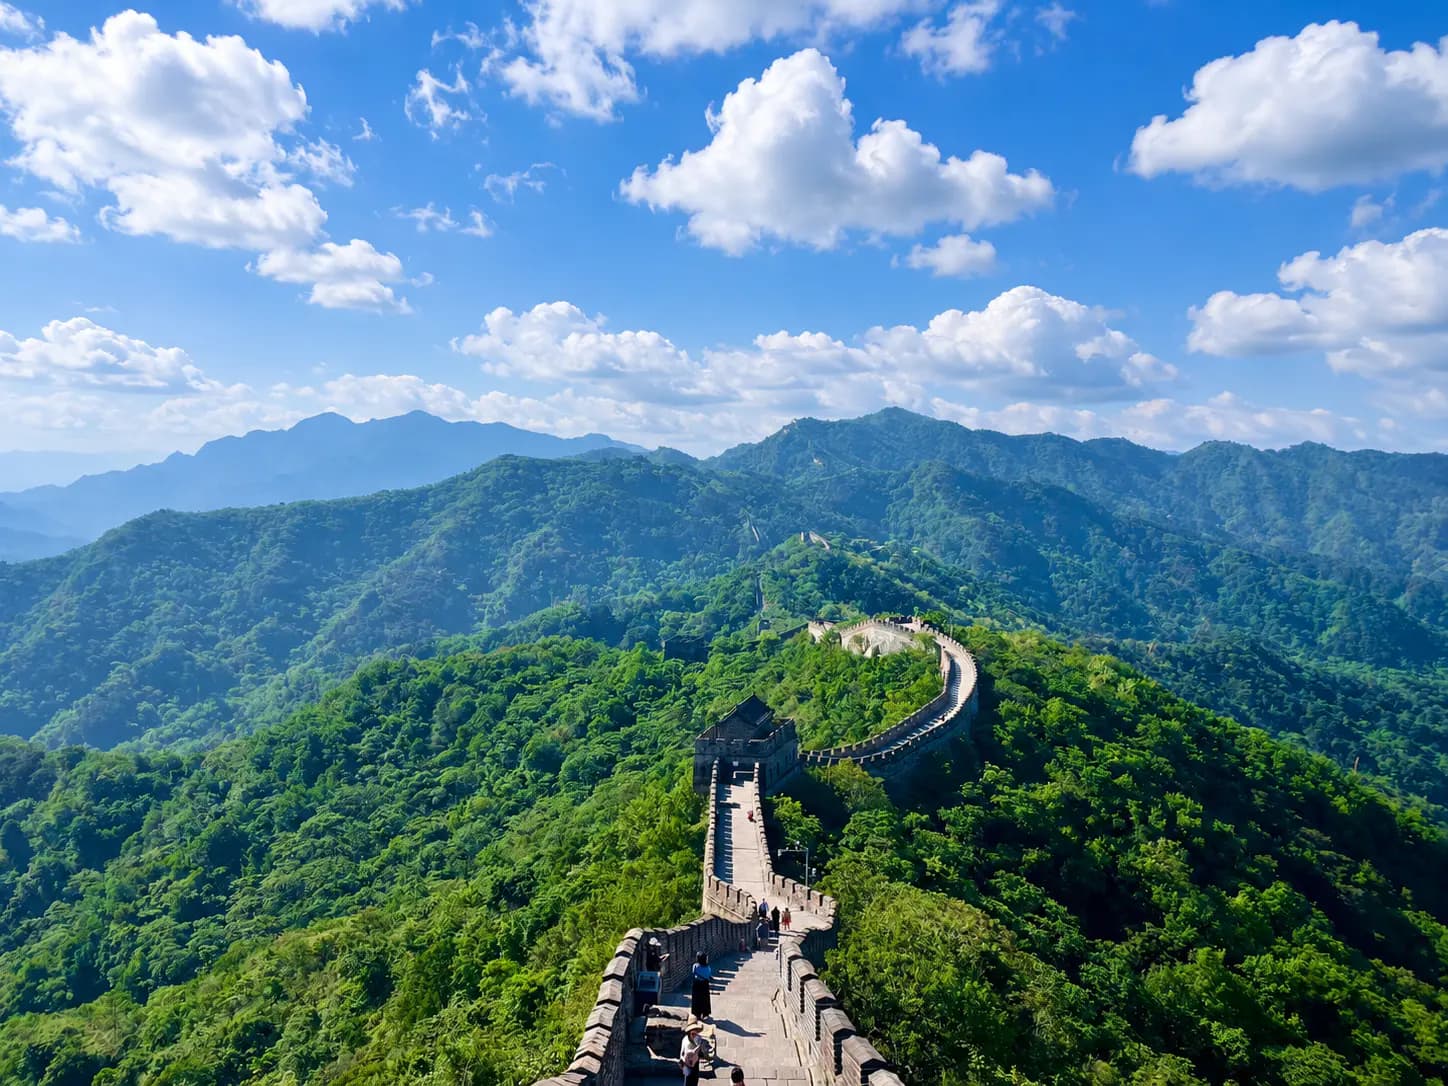
Mutianyu map panorama (orientation reference)
 Click to enlarge
Three zones on the Mutianyu map
The single most useful map rule
Cable car = Tower 14 / west route. Chairlift + toboggan = Tower 6 / east route. If you understand this, most Mutianyu route confusion disappears.
| Zone | Towers | Main access | Best for |
|---|---|---|---|
| East Zone | Tower 1–6 | Chairlift + toboggan | Toboggan, families, shorter routes |
| Middle Zone | Tower 7–13 | Walk-through section | Fewer crowds, photography, active walkers |
| West Zone | Tower 14–23 | Enclosed cable car (Tower 14 hub) | First-time visitors, full west ridge, Towers 21–23 extension |
How to read the Mutianyu Great Wall map
What the map controls
The official Mutianyu map is a panoramic view. North is marked, and the Wall runs mainly east-west along the mountain ridge. At Mutianyu the open visitor logic is controlled by tower sequence, ride access points, the open visitor section through Tower 23, shuttle bus stations, physical difficulty, and the return route.
| Map side | What you see |
|---|---|
| Right side | East Zone — Tower 1–6 |
| Center | Middle Zone — Tower 7–13 |
| Left side | West Zone — Tower 14–23 (includes Towers 21–23) |
Go deeper (this page stays map-first)
Why this page stays map-first
This article focuses on map orientation, tower zones, ride access points, facility locations, and map-based route selection. For deeper ticket, route, ride, and transport detail, use the linked guides.
| Topic | Link |
|---|---|
| Best route by time / fitness | Best Route at Mutianyu Great Wall |
| Cable car details | Mutianyu Great Wall Cable Car |
| Toboggan details | Mutianyu Great Wall Toboggan Guide |
| Cable car vs toboggan | Mutianyu Great Wall Cable Car vs Chairlift vs Toboggan |
| Ticket prices | Mutianyu Great Wall Tickets, Prices and Cost |
| Time planning | How Long to Spend at Mutianyu Great Wall |
| Transport from Beijing | How to Get to Mutianyu Great Wall from Beijing |
East zone: Towers 1–6 (map right)
Best for and main warning
Best for toboggan-focused visitors, families with older children, visitors wanting a shorter route, young travelers, and people who want a fun descent. Main warning: the toboggan is not on the west cable car side. It starts from Tower 6 in the east. The toboggan only goes down.
| Tower | Map meaning | Visitor use |
|---|---|---|
| Tower 1 | Eastern open endpoint / Big Corner Tower | Good for full east-route walkers |
| Tower 3 / 4 area | Zhengguan Platform / unique architecture | Architectural highlight |
| Tower 6 | Chairlift upper station + toboggan start | East-route hub |
Middle zone: Towers 7–13
The middle zone sits between the two ride systems. Tower 6 is the east chairlift / toboggan hub; Tower 14 is the west cable car hub; Towers 7–13 are the walking connector — with Tower 10 (Glass Steps) and Tower 11 (Outer Branch Wall) as the signature architecture stops.
- Tower 10: Glass Steps on the west stairs — the only Great Wall spot where glass reveals the Ming-era pathway below.
- Tower 11: Outer Branch Wall — a two-storey branch tower on a 10 m solid defensive wall, connected to but separate from the main ridge.
- Best for: active visitors walking Tower 14 toward Tower 6, photographers, and anyone combining cable car and toboggan.
- Practical note: fewer toilets and food outlets than the ride hubs — carry water.
Glass Steps at Watchtower 10

Outer Branch Wall at Tower 11
 Click to enlarge
 Click to enlarge
 Click to enlarge
Side entrances and horse-road access
Mutianyu's convenient access doors sit near watchtowers — not between every tower. They were built for troops and supply movement, not as casual visitor shortcuts.
- Typical size: about 2.2 m high and 0.9–1 m wide, with single- or double-arch tops.
- Original wooden doors are gone; stone door sockets and sills remain.
- Outside each door, stone steps lead to mountain paths; inside, winding steps reach the horse-road on the wall top.
- Best preserved example: blue-stone arch, frames, sill, and a drainage hole under the threshold to prevent waterlogging.
- "Do not treat these doors as an unofficial exit — stay on the open Tower 1–23 route."
Preserved stone side entrance

Ming iron cannons on the open wall
How to use this on your map plan
Cannons are quick photo stops, not separate tickets. Pair Tower 10 (Glass Steps + cannon) when walking the middle connector from west to east. Allow a few minutes at each mount — the carriages are heavy siege pieces, not decorative props.
| Location | What you see |
|---|---|
| Below Tower 5 | Large-caliber Ming iron cannon on carriage mount |
| Below Tower 9 | Ming iron cannon — fortress defence piece |
| Below Tower 10 | Ming iron cannon near the Glass Steps stop |
| Below Tower 13 | Ming iron cannon before the west-zone handoff |
| Great Wall Spiritual Exhibition Hall | Two additional Ming cannons on indoor display — see tickets guide |
Ming Dynasty iron cannon

West zone: Towers 14–23 (map left)
Best for and main warning
Best for first-time visitors, seniors using a short route, families using the cable car round trip, photographers, layover visitors, and travelers wanting the classic Mutianyu view. Towers 21–23 are now part of the open west zone (not a separate closed band). Tower 20 is still the classic high point for many visitors, but not mandatory — use Tower 16 or Tower 18 as safer turnarounds. Only continue to Towers 21–23 if you have time, fitness, and weather on your side.
| Tower | Map meaning | Visitor use |
|---|---|---|
| Tower 14 | West cable car upper station | Main starting point |
| Tower 15 | Film / photo landmark | Common first photo stop |
| Towers 17–18 | Classic Ming-style wall section | Good mid-route target |
| Towers 19–20 | Hero Slope / steep scenic section | Strong views; harder climb |
| Towers 21–23 | Reopened far-west extension (same west zone) | Optional add-on for fit walkers with extra time |
Transport on the map: scenic shuttle bus
What the scenic shuttle is and is not
All outside transport drops visitors at the lower visitor / parking area. From there, the official scenic shuttle bus moves you to the upper access points for the cable car or chairlift / toboggan. "Shuttle bus included" does not mean "transport from Beijing included" — it is internal scenic-area transport only.
| Shuttle direction | Takes you to |
|---|---|
| West shuttle direction | West cable car lower station |
| East shuttle direction | East chairlift / toboggan lower station |
West cable car on the map
The west cable car is a fully enclosed gondola system connecting the west shuttle area to the Tower 14 platform. It is the main way to reach the west zone.
- Map route: West cable car lower station → Tower 14 upper station.
- Best for: first-time visitors, seniors, families, layover travelers, wheelchair / stroller access where conditions allow, and visitors who want the west route.
- Map-based route: Tower 14 → Tower 18, Tower 20, or Towers 21–23 → return to Tower 14. The safest default is still cable car up/down at Tower 14.
East chairlift and toboggan on the map
The east system is connected to Tower 6. The chairlift runs from the lower station to Tower 6; the toboggan starts from the Tower 6 platform and descends to the lower station.
- Map route up: East chairlift lower station → Tower 6 upper station.
- Map route down: Tower 6 → toboggan to lower station.
- Best for: toboggan riders, active families, young travelers, visitors who prioritise fun over the west-route views.
- Map-based route: Tower 6 → Tower 4 or Tower 1 → return to Tower 6 → toboggan down.
Map route 1: Quick west check-in (~2–2.5h on-site)

Map route for a quick west check-in, highlighting key watchtowers and cable car stations.
Route flow
Visitor Center → scenic shuttle bus → west cable car to Tower 14 → walk to Tower 15 → return to Tower 14 → cable car down. The minimum route on the map; valid, but not the best Mutianyu experience unless time is limited.
| Item | Detail |
|---|---|
| Time | 2–2.5 hours |
| Difficulty | Very low |
| Best for | Layovers, seniors, tight schedules |
| Main map zone | West Zone |
| Key towers | 14, 15 |
Map route 2: Standard first-time west (~3–4h on-site)

Route 2 is recommended for first-time visitors, families, and casual hikers, taking approximately 3-4 hours to complete.
Route flow
Visitor Center → scenic shuttle bus → west cable car to Tower 14 → walk west toward Tower 20 → return to Tower 14 → cable car down. The default route for most visitors; strongest classic views with simple entry and exit. The Tower 19–20 section is the steepest but most spectacular part of the open route.
| Item | Detail |
|---|---|
| Time | 3–4 hours |
| Difficulty | Low to moderate |
| Best for | First-time visitors, families, casual hikers |
| Main map zone | West Zone |
| Key towers | 14, 15, 18, 19, 20 |
Map route 3: Toboggan-first east (~2.5–3.5h on-site)

Map route 3: Toboggan-first east (~2.5–3.5h on-site)
Route flow
Visitor Center → scenic shuttle bus → east chairlift to Tower 6 → walk toward Tower 4 or Tower 1 → return to Tower 6 → toboggan down. Use this route only if the toboggan is a priority. If scenery and timing matter more, the west cable car route is stronger.
| Item | Detail |
|---|---|
| Time | 2.5–3.5 hours |
| Difficulty | Low |
| Best for | Families with older children, young travelers |
| Main map zone | East Zone |
| Key towers | 6, 4, 1 |
Map route 4: Combined west → middle → east (4–6h on-site)

Map route 4 covers the west, middle, and east sections of the Great Wall, taking 4-6 hours to complete and is best for active travelers and photographers.
Route flow and ticket warning
Visitor Center → scenic shuttle bus → west cable car to Tower 14 → walk east through Towers 13–7 → reach Tower 6 → toboggan or chairlift down. Important: this route uses two different ride systems. West cable car is not the same operator route as the east chairlift / toboggan. Do not buy a west cable car round-trip ticket if your plan is to take the toboggan down.
| Item | Detail |
|---|---|
| Time | 4–6 hours |
| Difficulty | Moderate |
| Best for | Active travelers, photographers |
| Main map zones | West + Middle + East |
| Key towers | 14, 13–7, 6 |
Map-based decision grid
| Visitor type | Best map route | Why |
|---|---|---|
| First-time visitor | Tower 14 → Tower 20 or 23 → Tower 14 | Best classic west-ridge views |
| Senior traveler | Tower 14 → Tower 15/16 → Tower 14 | Easiest return |
| Family with young children | Tower 14 short west route | Lower route risk |
| Family with older children | Tower 6 → Tower 4/1 → toboggan | More fun |
| Layover traveler | Tower 14 → Tower 15/16 → Tower 14 | Timing control |
| Photographer | Tower 14 → Tower 20–23, then middle zone if time | Best ridge views |
| Active traveler | Tower 14 → Tower 6 → toboggan | Most complete route |
| Budget hiker | Walk more, use fewer rides | More physical effort |
| Mobility-limited visitor | West cable car route only | Most accessible route |
Facilities the legend usually marks
| Facility | Map location / use |
|---|---|
| Visitor Center | Main entrance / information |
| Parking | Lower scenic area |
| Taxi stand | Near visitor / shuttle area |
| Luggage storage | Visitor center and transport stations |
| Toilets | Visitor center, transport hubs, selected wall areas |
| Restaurants | Lower stations and selected route areas |
| Medical room | Visitor center and transport areas |
| Police station | Near main entrance |
| Emergency phone | Listed on the official map |
Common map mistakes
Mistake 1: thinking Tower 14 and Tower 6 are close exit points
They are connected by the Wall, but they belong to different ride systems. Walking between them takes time and energy, not a quick shortcut.
Mistake 2: buying round-trip cable car when planning the toboggan
Cable car round trip returns you to Tower 14. The toboggan descends from Tower 6. The two ride systems are not interchangeable on a single round-trip ticket.
Mistake 3: treating the scenic shuttle as transport from Beijing
The scenic shuttle is internal. It moves visitors from the lower scenic area to the cable car or chairlift access points — not from Beijing.
Mistake 4: planning Tower 20 for every visitor
Tower 20 is scenic but steeper. Seniors, children, and layover visitors are usually better turning around at Tower 15, Tower 16, or Tower 18.
Mistake 5: using outdated maps that stop at Tower 20
Towers 21–23 are now open as part of the west zone. Older guides list them as a separate "unopened" band — that is out of date. Plan west time through Tower 23 only if fitness and schedule allow; do not cross into wild-wall exits beyond the managed visitor boundary.
Mistake 6: ignoring facility gaps in the middle zone
Towers 7–13 are quieter, but service facilities are fewer. Bring water and do not depend on a toilet or restaurant at every tower.
FAQ: Mutianyu Great Wall map
- The west cable car goes to Tower 14. This is the main starting point for the west route toward Towers 20–23.
- The toboggan is on the east side of the map. It starts near Tower 6 and descends to the lower east station.
- The west zone, from Tower 14 through Tower 20 (and optionally Towers 21–23), is best for most first-time visitors because it gives the strongest panoramic views and simple cable car access.
- Families with young children should usually use the west cable car to Tower 14 and walk a short route. Families with older children may prefer the east chairlift and toboggan route.
- The normal open visitor section is Tower 1 through Tower 23. Towers 21–23 are on the far west of the same west zone (reopened — not a separate closed area). Do not cross beyond the official visitor boundary toward wild Jiankou.
- Yes. Tower 20 is on the west side of the open visitor section and is one of the highest scenic points of Mutianyu.
- Yes. This is the middle route connecting the west cable car side with the east chairlift / toboggan side. It is suitable for active visitors with enough time.
- Yes, but you must walk from Tower 14 to Tower 6 and use separate ride systems. Do not assume one round-trip ticket covers both.
- Facilities are mainly around the visitor center, shuttle bus areas, cable car / chairlift stations, and selected tower areas such as Towers 6 and 14. The middle section has fewer facilities, so carry water.
- The best short route is: shuttle bus, west cable car to Tower 14, walk to Tower 15, return to Tower 14, cable car down.
- At Watchtower 10 in the middle zone, on the stairs to the west of the tower. They are the only Great Wall walkway where glass reveals the original Ming-era stones below.
- A defensive extension with its own two-storey watchtower, connected to the main wall but forming a separate branch line with a roughly 10 m solid stone face.
Plan your Mutianyu visit using the map
DragonTrail Beijing can choose the right Mutianyu route based on your available time, fitness level, family or senior needs, cable car vs toboggan preference, hotel or airport pickup location, and required return time.
Recommended default for most visitors: scenic shuttle bus, west cable car to Tower 14, walk toward Tower 18 or Tower 20, return to Tower 14, cable car down.